Section Segmentation and User Permissions Part 2 of 2
Wednesday 02 July 2008 5:44:00 am
In contrast to users and user groups, roles and policies are not stored as content objects and nodes. Unlike content objects, there are no versions or translations of a role or policy. In other words, these access control components should be thought of as settings rather than content. However, do not confuse these with configuration files, which contain other types of settings. Roles and policies are stored in the database, and the only way you can work with them is through the User accounts tab.
Policies
A policy is a single rule that grants access to specific or all functionality of a module. You can set the following for each policy:
- Module: the highest level for which a policy can grant access. Examples include the "user" and "content" modules.
- Function: available functions depend on the module, and access can be granted to one or all functions of a module. If you want to give access to a subset (but not all) of the functions in a module, you have to create multiple policies, with one policy per function. Function examples include "create" and "edit" for the "content" module.
- Limitation: various levels of granularity to which the policy should apply.
Most of the modules and functions have intuitive, descriptive names, but be sure to consult your site administrator if you are unsure about what a module or function does. You can also use the Reference section in the documentation to find out more about a particular module. In most cases you will be dealing with read and edit permissions for the "content" module.
The following is a list with brief descriptions for each available limitation:
- Use the Class limitation to limit a policy to objects of certain types, such as articles or blog posts.
- Use the Language limitation to limit a policy to object versions in specific languages, such as French translations only. This only applies to multilingual sites.
- Use the Node limitation to limit a policy to a specific node. For example, you might want to enable Editor users to edit the site's frontpage, but not the contents it pulls from other areas of the site. Or, you might want to provide read access to a specific node within a restricted area.
- Use the Owner limitation to limit a policy to objects that are owned by the user who is logged in. For example, community members might be permitted to only edit their own objects (such as posts in a forum or article comments).
- Use the Parent class limitation to limit a policy based on the type of the object encapsulated by the parent node. For example, a user might be permitted to comment on blog and forum posts, but not articles.
- Use the Section limitation to limit a policy to objects that are assigned to certain sections. This is used to set up protected areas and generally keep site management off the front-end pages.
- Use the Siteaccess limitation to limit a policy to a specific site interface. For example, you might grant a group of users access to log in to the Administration Interface.
- Use the Status limitation to limit a policy to a certain version status (such as "Published" or "Archived").
Use the Subtree limitation to limit a policy to a certain part of the content node tree. For example, a policy might allow content to be created, but only under the "Training" and "Support" nodes. This is typically used to segment editorial responsibility, and to limit areas in which public, user-contributed content is accepted.
This limitation has some similarities to the Section limitation, but also some important differences. There might be multiple subtrees belonging to the same section, and a subtree might contain several sections.
Roles
A role is a container and grouping tool for policies. Remember that only roles, not policies, can be assigned to users and user groups. Once you have set up a role, you can re-use it and assign it as many times as necessary. Because of this you can, for example, build an access hierarchy with cumulative rights.
Managing roles
The Role list interface provides access to role management operations. To access it, click the Roles and policies link in the Access control panel in the User accounts tab.

Role list interface
Each existing role has a set of buttons that can be used to assign, copy, or edit the role. You can also remove or add roles uses the buttons at the bottom.
Click one of the role names to bring up the Role management interface for a particular role:

Role management interface
Here, you can view the policies in a role, as well as the users and groups that have been assigned that role.
Assigning a role
Role assignment means to make a connection between access rules and user accounts. After you click the Assign button, use the Browse interface to select one user or user group to which to assign the role, then click the Select button:

Browse interface -- assign role
If you want to assign a role to multiple users or user groups, you must repeat the operation, as you cannot select more than one target for the assignment at once.
You can also assign a role with Subtree or Section limitations, similar to the limitations available for individual policies. This can only be done from the Role management interface. First, select the desired limitation in the dropdown list, then click the Assign with limitation button. For Subtree limitations, this will open the Browse interface, where nodes from the content structure will be shown. For Section limitations, the page will simply reload with a special-purpose Select section window:
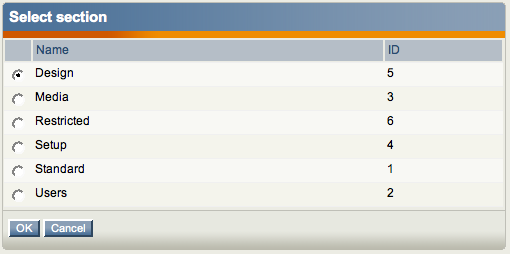
Select section window
Managing policies
Recall that policies cannot be assigned directly to a user or user group. You have to first add the policy to a role, and then assign the role. Because of this, there is no separate "create / delete / copy / edit / assign" functionality for policies as there is for roles. To make policy changes, you have to first edit the role that contains the policy, by clicking the edit button next to a role in the Role list interface.
To remove one or more policies from a role, mark the corresponding checkboxes, then click the Remove selected button.

Managing policies from within a role
To create a new policy in a role, follow the steps below.
1. Click the New policy button when editing a role. This will open the Policy wizard:

Policy wizard introduction
2. The wizard contains three steps with instructions to help you create a new policy. Select a module, such as "content", from the dropdown list. Then, grant access to all or just one function of that module by clicking the corresponding button. If you click the Grant access to all functions button, the policy will be added to the role and the procedure is complete. If you click the Grant access to one function button, the wizard continues to step two. (Note that the numbering of steps in the wizard does not correspond to the numbering of steps in this procedure.)
3. Select a function, such as "translate", from the dropdown list.

Policy wizard -- select module and function
Grant full or limited access to the function by clicking the corresponding button. Some functions do not support limitations, such as when you grant access to use notifications. If this is the case, or if you grant full access to the function, the policy will be added to the role for the given module and function (and the procedure is complete).
If you selected to grant limited acc4. ess to the function, continue with step three of the wizard, where you select the function limitations.
Set the desired function limitations using the appropriate controls. For example, you could limit the policy to apply to articles within the Standard sections in English and Norwegian (excluding French and German).

Policy wizard -- specify limitations
The function limitations vary, depending on the module and function previously selected. Keep in mind that limitations are applied together, making the resulting function limitation more permissive for each limitation you select within the policy.
5. Click the OK button to finish the wizard. The policy will be added to the role that is currently being edited.