Selling Pay-Per-Download Products
Sunday 30 August 2009 3:00:00 pm
Our example site will sell PDF books, giving buyers the advantage of getting the book cheaper and faster, and removing the need for us to ship the books.
In preparation for the following steps and to ease the testing process, log in to the Administration Interface as an Administrator user, and create a user under the Members user group. This article will name this user "Test User". This user will be your test buyer.

Test User
Product class
A default Website Interface installation comes with a basic "Product" class, consisting of at least a name, a description, an image, and a price. The "Price" attribute is what makes the content object a recognized product in the webshop, and the other attributes are useful for descriptive purposes.
For simplicity, we will assume that every product on our site represents a digital download. Therefore, we will modify the existing "Product" class in order to associate a file with each Product object.
Sign in to the Administration Interface using the Administrator user account and go to the "Setup > Classes" page. Then, click to view the classes in the "Content" class group. In the list of classes, click the "Edit" icon for the "Product" class.

Product Class
At the bottom of the "Class edit" interface for the "Product" class, add a new attribute of the "Object relation" type. Name the attribute "Download file" with an identifier "download". For our purposes, we will make this attribute required but not searchable.

Download File Attribute
The reason why we are using an attribute of the "Object relation" datatype is so that we can store the actual files in a location of the content tree separate from products. The products can be viewed by everybody, but access to the download files will, by default, be prohibited to the general public and granted to buyers as needed.
Location for download files
A good place to put the download files is in the media library, as the general public cannot browse that section through the front-end of the site, and the fact that it is separate from the rest of the content makes for better organization. Therefore, create a "Folder" object called "Downloads" in the media library.
Under the "Downloads" folder, create a "File" object, uploading the file for a book you are selling.

Media Library Downloads Folder
Create a product object
Since we are using a Website Interface install we can use the existing products location and templates. Browse to the "Content structure" tab in the Administration Interface, click to the "Products" folder, then create a sub-item folder called "Books". Under the "Books" folder, create a "Product" object. Give it whatever name, description, price, and image you want. When it comes to the "Download file" attribute, add the "File" object you created above as the related object.
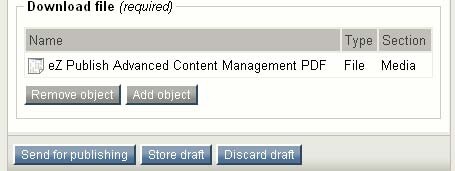
Download File Related Object
Once you have published your book product, view it on the front-end of the site, noting that the download file is not used by the template and thus not publicly displayed.

Book Product
Now, log in to the front-end of the site using the Test User account you previously created. If you try to access the file directly on the front end (through a URL such as "yoursite.com/Media/Downloads/eZ-Publish-Advanced-Content-Management-PDF"), you should get an "Access denied" error.
Pay-per-download role
Now, let's create create a role that will provide access to the files associated with purchased products. Under the "User accounts" tab in the Administration Interface, click the "Roles and policies" link in the left menu. Then, create a new role called "Pay-per-download" that has a policy giving permission to the "read" function of the "content" module under the "Media" section.

Pay Per Download Role
This is a broad role that we will assign per-user, per-product using the subtree limitation. This assignment will be done automatically at the end of the checkout process. However, you can test this by assigning the role to the "Test User" account, with a subtree limitation of the "File" object you created.

Role Assignment
Then, see whether that Test User user can access "yoursite.com/Media/Downloads/eZ-Publish-Advanced-Content-Management-PDF". When you have confirmed this, remove the role assignment.
Now that we've set up the content and permission structure for our pay-per-download functionality, we can move on to the next step, which is installing a payment gateway.